The Ultimate Guide to Using Low Tack Vinyl for Your Next Project
So, you’re thinking about using low tack vinyl for your next project? Good call! This stuff is pretty neat, especially when you need something that sticks but won’t cause a fuss later. Whether you’re sprucing up your home, making some temporary signs, or getting crafty, low tack vinyl can be a real game-changer. It’s all about getting that perfect hold without leaving behind any sticky mess or damaging your surfaces. Let’s dig into everything you need to know to make your projects look awesome with this versatile material.
Key Takeaways
- Low tack vinyl is special because it uses a gentle adhesive that sticks well but removes easily, unlike stronger vinyl types that can leave residue or damage surfaces.
- It’s great for things like temporary signs, wall decorations, and craft projects where you might want to change things up later without a lot of hassle.
- Always clean and dry your surfaces before putting down low tack vinyl. This helps it stick right and makes sure it comes off cleanly when you’re done.
- When applying, take your time and use the right tools to avoid bubbles. If you get some, don’t worry, there are easy ways to fix them.
- To keep your low tack vinyl looking good and make it last, store it properly and clean it gently. This helps you get the most out out of it for all your creative ideas.
Understanding Low Tack Vinyl
What Makes Low Tack Vinyl Unique?
Low tack vinyl stands out because of its easily removable adhesive, making it ideal for temporary applications. This specialized vinyl offers a gentle grip, preventing damage to delicate surfaces. Unlike permanent vinyl, it peels away cleanly, leaving no sticky residue behind. What projects could benefit from this damage-free solution?
The Science Behind Gentle Adhesion
The secret to low tack vinyl lies in its adhesive composition, engineered for temporary bonding. The adhesive is designed to create a weaker bond, allowing for easy removal without harming the underlying surface. This makes it perfect for applications where you need a temporary adhesive vinyl decal without the worry of damage. How does this technology open up new possibilities for your projects?
Comparing Low Tack to Other Vinyl Types
Low tack vinyl differs significantly from high tack and permanent vinyl options. High tack vinyl is designed for strong, lasting adhesion, while permanent vinyl offers the most durable bond. Low tack provides a middle ground, prioritizing easy removal over long-term adhesion. Consider using heavy-duty 18oz custom outdoor vinyl banners for long-lasting outdoor use. Which vinyl type best suits your project’s specific needs?
Optimal Applications for Low Tack Vinyl
Temporary Signage and Promotions
Low tack vinyl shines when you need temporary signage. Think short-term promotions, sales, or event announcements. It adheres easily to surfaces without leaving residue, making it perfect for retail windows, trade show displays, and even vehicle wraps for limited-time campaigns. This means you can update your message frequently without damaging the underlying surface, saving you time and money on repairs.
Interior Decor and Wall Graphics
Transform your living or workspace with low tack vinyl wall graphics. It’s an excellent choice for adding temporary flair to walls, mirrors, and other smooth surfaces. Whether you’re decorating for a party, creating seasonal displays, or simply want to experiment with different looks, low tack vinyl offers a hassle-free solution. Plus, it’s easy to remove and reposition, allowing you to change your decor as often as you like. Are you ready to explore the possibilities of temporary interior design?
Crafting and Stenciling Projects
Low tack vinyl is a crafter’s best friend, especially for stenciling. Its gentle adhesion ensures clean lines and prevents paint bleed, resulting in professional-looking projects every time. Use it for creating custom t-shirts, personalized home decor, or intricate paper crafts. The ease of cutting and weeding low tack vinyl makes it ideal for both beginners and experienced crafters. What amazing project will you create next using low tack vinyl?
Preparing Surfaces for Low Tack Vinyl

Cleaning and Drying Techniques
Surface preparation is key for successful low tack vinyl application. Start by thoroughly cleaning the surface with a mild detergent and water to remove any dust, grease, or debris. This ensures the vinyl adheres properly and prevents imperfections. After cleaning, completely dry the surface with a lint-free cloth. This prevents moisture from interfering with the adhesive, leading to bubbles or peeling. What cleaning products work best for your specific surface type?
Ideal Surface Materials
Low tack vinyl works best on smooth, non-porous surfaces. Painted walls, glass, and metal are excellent choices. These surfaces provide a clean and even base for the vinyl to adhere to. Avoid applying low tack vinyl to rough or textured surfaces like brick or unfinished wood. These surfaces can prevent proper adhesion and lead to a less-than-ideal result. Are you unsure if your surface is suitable? Consider testing a small piece of vinyl in an inconspicuous area first.
Avoiding Common Application Mistakes
Several common mistakes can hinder the application of low tack vinyl. One frequent error is applying vinyl to a surface that isn’t completely clean or dry. Another is using excessive force during application, which can stretch or tear the vinyl. To avoid these issues, take your time and use a soft applicator to gently smooth the vinyl onto the surface. Also, make sure to check for vinyl application tips before you start. By avoiding these common pitfalls, you can achieve a professional-looking finish and ensure your low tack vinyl project is a success.
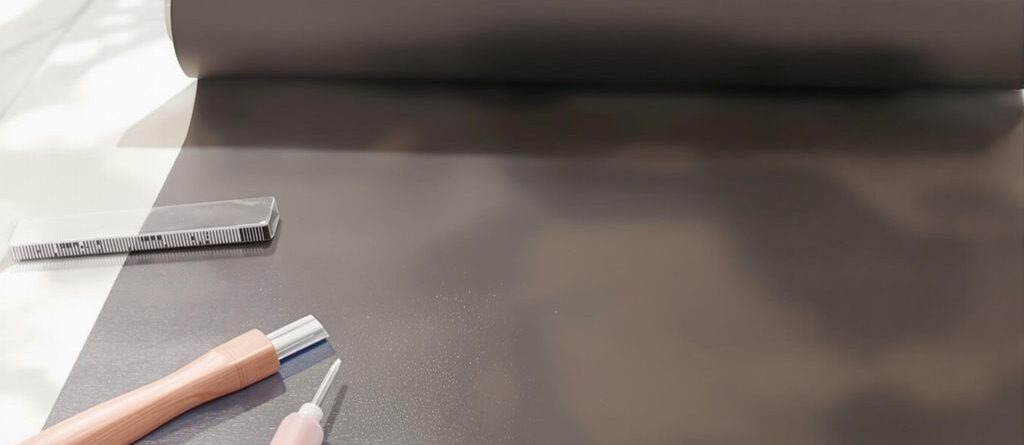
Step-by-Step Application of Low Tack Vinyl

Tools and Materials Needed
Proper preparation is key for a successful low tack vinyl application. Gather your essential tools before you begin, including a squeegee, measuring tape, level, and a clean, lint-free cloth. Having everything at hand will streamline the process and minimize errors, ensuring a smooth and professional finish. Do you have all your tools ready?
Precise Placement Strategies
Accurate placement is crucial for achieving the desired aesthetic. Start by measuring and marking the intended location with a pencil or painter’s tape. Use a level to ensure straight lines, especially for wall graphics or signage. Consider using the hinge method for larger applications, securing one edge and gradually applying the vinyl to avoid bubbles and wrinkles. How can you ensure perfect alignment for your project?
Troubleshooting Bubbles and Wrinkles
Even with careful application, bubbles and wrinkles can sometimes occur. Use a squeegee to gently work out any air pockets from the center towards the edges. For stubborn bubbles, a tiny pinprick can release trapped air, followed by smoothing with the squeegee. If wrinkles appear, carefully lift the vinyl and reapply, ensuring a smooth, even surface. What are your go-to techniques for eliminating imperfections?
Removing Low Tack Vinyl Without Damage
Gentle Removal Techniques
Removing low tack vinyl carefully is key to preserving your surfaces. Start by gently lifting an edge of the vinyl with your fingernail or a plastic putty knife [decal edges](#3668]. Avoid using metal tools, as they can scratch or damage the underlying material. Slowly peel the vinyl back at a shallow angle, applying even pressure to minimize tearing and ensure a clean release. This method helps prevent damage and keeps your surfaces looking their best.
Residue-Free Solutions
Sometimes, even low tack vinyl can leave behind a bit of adhesive residue. For a residue-free removal, try using a soft cloth dampened with warm, soapy water. Gently rub the affected area in a circular motion to loosen the adhesive. If soap and water aren’t enough, consider using a specialized adhesive remover designed for delicate surfaces. Always test any cleaning solution in an inconspicuous area first to ensure it doesn’t damage the original surface. This ensures a clean and professional finish.
Preserving the Original Surface
Protecting the original surface is paramount when removing any type of adhesive vinyl. Before applying any removal techniques, assess the surface material to determine its durability and sensitivity. For delicate surfaces like painted walls, use a hairdryer on a low setting to gently warm the vinyl, which can soften the adhesive and make it easier to peel away without lifting the paint. Always work slowly and carefully, and avoid pulling the vinyl too forcefully. What steps will you take to ensure the surface remains pristine?
Maximizing the Lifespan of Your Low Tack Vinyl
Proper Storage Practices
Storing your low tack vinyl correctly is key to preventing premature wear and tear. Keep rolls in a cool, dry place away from direct sunlight to avoid adhesive degradation and material warping. Proper storage ensures your vinyl is ready for use whenever you need it, saving you money and frustration.
Cleaning and Maintenance Tips
Regular cleaning helps maintain the appearance and extend the life of your low tack vinyl. Gently wipe the surface with a soft, damp cloth to remove dust and debris, avoiding harsh chemicals that can damage the adhesive. What simple cleaning routine can you implement to keep your vinyl looking its best?
Environmental Considerations
Understanding environmental factors is crucial for maximizing the lifespan of your low tack vinyl. Extreme temperatures and humidity can affect the adhesive and material, so consider using outdoor vinyl banners designed for specific conditions. By being mindful of the environment, you can ensure your vinyl projects last longer and look better.
Creative Project Ideas with Low Tack Vinyl
Seasonal Window Displays
Seasonal window displays are a fantastic way to attract attention and boost sales. Low tack vinyl makes it easy to create eye-catching designs that can be quickly changed as seasons and promotions evolve. Imagine transforming your storefront with vibrant fall foliage in October and then seamlessly switching to festive holiday scenes in December; this flexibility allows you to keep your window displays fresh and engaging, drawing in more customers and enhancing your brand’s appeal. What creative themes will you bring to life in your windows?
Customizable Event Decor
Customizable event decor can elevate any gathering, from birthday parties to corporate events. Low tack vinyl allows you to personalize banners, wall decorations, and even floor graphics without the worry of damaging surfaces. Think about creating a stunning photo backdrop for a wedding or adding branded elements to a conference space; the possibilities are endless, and the ease of removal ensures a stress-free cleanup. How can you use low tack vinyl to make your next event unforgettable?
Educational and Playroom Graphics
Educational and playroom graphics can transform learning spaces into engaging environments. Low tack vinyl is perfect for creating colorful alphabet charts, interactive maps, and fun wall decals that can be easily repositioned as children grow and learn. Consider designing a solar system mural for a bedroom or a world map for a classroom; these visuals not only enhance the aesthetic appeal but also provide valuable learning opportunities. What educational adventures will you create with low tack vinyl?
Want to get creative with your projects? Low tack vinyl is super easy to use and perfect for all sorts of crafts. It sticks well but comes off clean, so you can change your mind without a mess. Check out our website for more cool ideas and tips on how to use it!
Wrapping Up Your Low Tack Vinyl Journey
So, there you have it. Low tack vinyl is pretty cool, right? It’s not just some fancy material; it’s a real problem-solver for all sorts of projects. Whether you’re just starting out or you’ve been doing this for a while, knowing how to use this stuff can make a big difference. It’s all about getting those clean lines and making sure your work looks good without a huge headache. Give it a shot on your next project, and you’ll probably wonder how you ever got by without it. It really does make things a lot easier.
Frequently Asked Questions
What makes low tack vinyl different from other types of vinyl?
Low tack vinyl is special because it has a light, gentle glue that sticks well but is easy to remove. It won’t leave sticky marks or damage surfaces. This is different from regular vinyl, which has a much stronger glue that’s harder to take off.
Can low tack vinyl be used on any surface?
Yes, you can use low tack vinyl on painted walls, glass, metal, and smooth plastic. Just make sure the surface is clean and dry first. It’s great for decorating without worrying about ruining your paint.
What’s the best way to prepare a surface for low tack vinyl?
Before putting on low tack vinyl, always clean the surface with a mild cleaner and let it dry completely. Any dust or dirt can stop the vinyl from sticking properly, and moisture can cause bubbles.
How do I fix bubbles when applying low tack vinyl?
To get rid of bubbles, use a squeegee or a credit card to gently push them towards the edge of the vinyl. If a bubble won’t go away, you can carefully poke a tiny hole in it with a pin and then smooth it down.
How do I take off low tack vinyl without harming the surface?
To remove low tack vinyl without damage, start by peeling it slowly from one corner. Pull it at a shallow angle, almost flat against the surface. If it’s a bit stubborn, you can warm it gently with a hairdryer to soften the glue.
How can I make my low tack vinyl last longer?
To make your low tack vinyl last longer, store any unused rolls upright in a cool, dry place away from direct sunlight. Once applied, clean it gently with a soft, damp cloth if needed, and avoid harsh cleaners.