Choosing the Perfect Backdrop Size for Your Photography Studio
Picking the right backdrop size for your photography studio is a big deal. It really changes how your photos look, from how you frame your subjects to the overall vibe. We’re going to talk about popular backdrop sizes like 5×7, 8×8, and 9×10 feet, and how each one works best for different photo shoots, how much space you have, and the size of your subjects. Getting this right means better pictures and happier clients.
Key Takeaways
- Think about your studio space, how many people you’re shooting, and if you need to move the backdrop around when picking a backdrop size.
- Different backdrop sizes work best for different kinds of photos – a 5×7 is good for headshots, an 8×8 is great for small groups, and a 9×10 is perfect for bigger family shots.
- You can make your backdrop investment go further by choosing a slightly bigger size for flexibility, or by using editing software to extend the background if needed.
- Keep some distance between your subject and the backdrop to avoid shadows and make lighting easier.
- Make sure your backdrop’s height and width match what you’re trying to achieve with your photos, whether it’s for a single person or a large group.
Key Considerations for Backdrop Size Selection

Choosing the right backdrop size can feel like a big decision, but it doesn’t have to be! It’s all about thinking through a few key things before you click that ‘buy’ button. Let’s break it down.
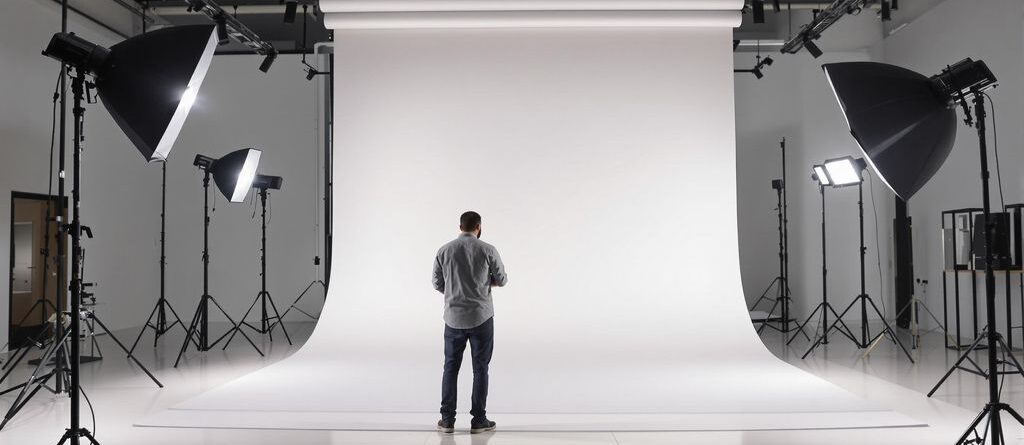
Assessing Your Studio Space
First things first, take a good look around your studio. How much room do you actually have? There’s no point in dreaming about a massive backdrop if it’s going to swallow your entire workspace. Consider the width, height, and depth of your space. Think about where you’ll position your lights and how much room you need to move around. A small room might be perfect for a vinyl lettering setup, while a larger studio can handle something more expansive. Don’t forget to account for storage too – where will you keep the backdrop when it’s not in use?
Determining Subject Count and Size
Are you mostly shooting headshots, or full-body portraits? Individuals, couples, or large groups? The size of your subject (or subjects!) is a major factor in choosing the right backdrop. A 5×7 backdrop might be fine for close-ups, but you’ll need something much larger for full-body shots or group photos. Think about the poses you want to achieve and make sure the backdrop can accommodate them. If you’re planning on doing a lot of family portraits, you’ll definitely want to invest in a bigger backdrop.
Evaluating Backdrop Portability Needs
Do you primarily shoot in your studio, or do you travel to different locations? If you’re always on the go, portability is key. A large, heavy backdrop might be a pain to transport and set up. Consider a smaller, lightweight option that’s easy to fold and carry. There are even pop-up backdrops that are super convenient for on-location shoots. Think about how often you’ll be transporting the backdrop and choose something that fits your lifestyle.
It’s easy to get caught up in the excitement of buying new equipment, but taking the time to carefully consider your needs will save you time, money, and frustration in the long run. A well-chosen backdrop can make a huge difference in the quality of your photos, so it’s worth doing your homework.
Understanding Common Backdrop Dimensions
It’s easy to get lost in the world of photography backdrops. They come in all shapes and sizes, and knowing which one to pick can feel overwhelming. Let’s break down some common dimensions to help you make the right choice for your studio.
Compact 5×7 Backdrop for Headshots and Products
These backdrops are great for smaller spaces and specific types of photography. A 5×7 backdrop is ideal for headshots, product photography, and close-up portraits. They’re easy to store and transport, making them a good option if you’re just starting out or need something portable. However, they might not be suitable for full-body shots or larger groups.
Versatile 8×8 Backdrop for Small Groups
An 8×8 backdrop offers more flexibility than the 5×7. It’s a square, which can be useful for horizontal portraits and small group photos. You can comfortably photograph individuals, couples, or even small families with this size. It’s a good middle-ground option if you want something that can handle a variety of subjects without taking up too much space. If you’re looking for custom backlit decals for your studio, consider how they’ll complement your backdrop size.
Expansive 9×10 Backdrop for Family Portraits
For larger groups or full-body shots, a 9×10 backdrop is a solid choice. This size gives you plenty of room to work with, allowing you to position your subjects comfortably and create dynamic compositions. It’s especially useful for family portraits, fashion photography, and any situation where you need to capture a lot of space. Keep in mind that these backdrops require more studio space and can be more difficult to transport.
Choosing the right backdrop size is a balancing act. You need to consider your studio space, the types of subjects you’ll be photographing, and your budget. Don’t be afraid to start with a smaller, more versatile option and then expand your collection as your needs evolve.
Optimizing Backdrop Use for Specific Photography Genres
Backdrop Size for Newborn Photography
When it comes to newborn photography, smaller backdrops are often the way to go. A 5×7 foot backdrop can be ideal for capturing those precious, tiny features. You’re usually working with a very contained space, focusing on close-up shots and details. Think soft fabrics, muted colors, and a cozy atmosphere. You don’t need a ton of background to fill the frame; it’s all about the baby!
Backdrop Size for Full-Body Portraits
For full-body portraits, you’ll need something larger to accommodate your subject’s entire height and allow for some space around them. An 8×8 or even a 9×10 foot backdrop is a good starting point. Consider the poses you want to achieve. Will your subject be standing, sitting, or perhaps even doing some dynamic movement? All of this impacts the backdrop size you’ll need. Don’t forget to factor in some extra width to avoid those awkward cropped-off limbs!
Backdrop Size for Large Group Shots
Large group shots require the most expansive backdrops. A 9×10 foot backdrop might work for smaller groups, but for larger families, wedding parties, or corporate teams, you’ll likely need something even bigger. Think about a photo backdrop boards that’s at least 9×20 feet. It’s not just about fitting everyone in the frame; it’s also about creating a visually appealing composition. You want to avoid a cramped, claustrophobic look.
When shooting large groups, consider using a backdrop with a ‘sweep’ – where the backdrop extends onto the floor. This creates a seamless look and prevents a distracting horizon line behind your subjects. Also, make sure to use proper lighting to avoid shadows and ensure everyone is evenly lit.
Here’s a quick guide:
- Small Groups (2-4 people): 8×8 ft
- Medium Groups (5-8 people): 9×10 ft
- Large Groups (9+ people): 9×20 ft or larger
Remember, these are just guidelines. Always assess your specific needs and adjust accordingly.
Maximizing Your Backdrop Investment
Choosing a Larger Backdrop for Flexibility
When you’re setting up your photography studio, it’s tempting to save money by buying the smallest backdrop that seems to fit your immediate needs. However, investing in a larger backdrop upfront can actually save you money in the long run. A larger backdrop gives you more flexibility in terms of the types of shots you can take. You might start with headshots, but what if you want to move to full-body portraits or even small groups? A larger backdrop accommodates these changes without requiring you to buy a whole new setup. Think of it as future-proofing your studio.
Utilizing Post-Production for Backdrop Extension
Post-production techniques can be a lifesaver when your backdrop feels a little too small. While it’s not a substitute for having the right size backdrop to begin with, knowing how to extend your backdrop digitally can add value to your existing setup. Here’s how you can make the most of it:
- Content-Aware Fill: Photoshop’s content-aware fill can intelligently extend simple backdrops. It works best with solid colors or subtle gradients.
- Cloning and Patching: For more complex patterns, cloning and patching tools can help you duplicate sections of the backdrop to fill in gaps.
- Adding Digital Backgrounds: If your backdrop is truly insufficient, consider replacing it entirely with a digital background. This requires careful masking and color matching, but it can open up a world of creative possibilities.
Remember, post-production should enhance your images, not fix fundamental issues. Always aim to get as much right in-camera as possible. Relying too heavily on digital fixes can lead to a less natural and professional final product.
Selecting Durable Backdrop Materials
The material of your backdrop significantly impacts its lifespan and overall value. Cheaper materials might save you money initially, but they often tear easily, wrinkle excessively, and fade over time. Investing in durable materials ensures your backdrop lasts longer and maintains a professional look. Here are some popular and durable options:
- Canvas: Canvas backdrops are known for their durability and ability to hold paint well. They can be more expensive but are a worthwhile investment for serious photographers.
- Muslin: Muslin is a versatile and relatively affordable option. It’s lightweight and easy to drape, but it can wrinkle easily. Look for higher-quality muslin for better durability.
- Seamless Paper: Seamless paper is great for creating a clean, smooth background. While it’s not as durable as fabric options, it’s cost-effective and easy to replace when it gets damaged. Consider printed adhesive vinyl for a more durable option.
Choosing the right material can save you from frequent replacements and maintain the quality of your studio for years to come. Consider these factors when making your decision:
| Material | Durability | Wrinkle Resistance | Cost |
|---|---|---|---|
| Canvas | High | Medium | High |
| Muslin | Medium | Low | Medium |
| Seamless Paper | Low | High (when new) | Low |
Advanced Techniques for Backdrop Integration
Maintaining Subject Distance from the Backdrop
Subject distance is super important. Getting the right distance between your subject and the backdrop can totally change the look of your photos. If your subject is too close, you might get unwanted shadows or the backdrop’s texture might be too noticeable. Too far, and you lose that connection with the background, making it seem detached. Experimenting is key, but a good starting point is usually a few feet. This gives you some depth of field to play with and helps avoid harsh shadows. Also, remember that the type of lens you’re using affects this too. A wider lens might need more distance than a telephoto lens.
Preventing Wrinkles with Weighted Backdrops
Wrinkles are the enemy! They can ruin an otherwise great shot. Here’s how to fight back:
- Weighted Bottoms: Use backdrop weights or clamps along the bottom edge to keep the material taut. This is especially helpful for fabric backdrops.
- Steaming/Ironing: Before your shoot, take the time to steam or iron your backdrop. This makes a huge difference in the final result. A fabric backdrop is more forgiving than paper, but even fabric benefits from a little smoothing.
- Proper Storage: How you store your backdrop matters. Rolling it up instead of folding it can prevent creases. If you must fold it, try to do so loosely.
I once had a shoot where I completely forgot to check for wrinkles. The photos looked awful, and I had to spend hours in post-production trying to fix them. Now, I always double-check and use weights religiously.
Aligning Backdrop Dimensions for Seamless Shots
Getting those seamless shots is all about matching the backdrop to your subject and the camera’s field of view. Think about the dimensions you need before you start shooting. A step & repeat backdrop banner might need a different approach than a simple headshot backdrop. Here’s a quick guide:
- Width: Make sure the backdrop is wide enough to cover the entire frame, even when the subject moves around.
- Height: The height should be sufficient to avoid the floor or ceiling showing in the shot. Consider the height of your tallest subject.
- Perspective: Adjust your camera angle and subject placement to minimize distortion and ensure the backdrop appears straight and even.
Here’s a simple table to illustrate:
| Subject | Recommended Backdrop Width | Recommended Backdrop Height |
|---|---|---|
| Single Person | 5-7 feet | 7-10 feet |
| Small Group | 8-10 feet | 8-12 feet |
| Large Group | 10+ feet | 10+ feet |
Exploring Backdrop Height and Width Dynamics

It’s easy to think about backdrops in terms of just ‘big’ or ‘small,’ but the specific dimensions – height and width – play a huge role in what you can actually do with them. Getting this right can save you a ton of headaches later on. Let’s break down how to think about these dimensions.
Selecting Width for 3-Foot Tall Backdrops
When you’re working with a backdrop that’s only about 3 feet tall, the width becomes super important. The width you choose directly impacts the types of subjects you can photograph. For small products or even pets, you might get away with a narrower width, say 4 to 7 feet. But if you want more flexibility, especially if you think you might want to include slightly larger items or have more room to play with angles, bumping that width up to 6 to 10 feet is a good idea. It gives you that extra breathing room.
Choosing Crossbar Width for 8-10 Foot Tall Backdrops
Now, let’s talk about those taller backdrops, the ones in the 8 to 10-foot range. These are workhorses for things like portraits, especially of kids or even smaller families. The key here is the crossbar width. If you’re shooting a family of four or five, a 6 to 10-foot wide crossbar should do the trick. But if you’re planning on wrangling a larger group, like six to eight people (or more!), you’ll definitely want to upgrade to an 8 to 14-foot wide crossbar. It’s all about making sure everyone fits comfortably in the frame without feeling cramped. You can find great deals on custom printing services online.
Matching Backdrop Dimensions to Subject Needs
Ultimately, picking the right backdrop size is all about thinking ahead. Consider these points:
- What kind of subjects will you be photographing most often?
- How much space do you have in your studio?
- Do you need to be able to move the backdrop around easily?
It’s better to err on the side of a slightly larger backdrop than one that’s too small. You can always crop or adjust in post-production, but you can’t magically add more backdrop if you run out of space. Think about the types of shots you want to achieve and choose accordingly. A versatile 9′ x 10′ backdrop can be a great option for family portraits.
Here’s a simple table to help you visualize some common backdrop sizes and their ideal uses:
| Backdrop Size | Ideal Use |
|---|---|
| 5×7 | Headshots, small product photography |
| 8×8 | Small groups, individual full-body shots |
| 9×10 | Family portraits, larger group shots |
| 8×13 | Full-body flexibility for small groups |
Want to know how big your backdrop should be? It’s super important to get the size just right for your event or display. If you pick the wrong size, your message might not look as good as it could. We’ve put together a simple guide to help you figure out the best dimensions for your needs. Check out our website to learn more and make sure your backdrop is perfect!
Wrapping It Up
So, there you have it. Picking the right backdrop size really makes a difference in your photos. It’s not just about what looks good, but also about what works for your space and what you’re shooting. Think about your studio size, how many people will be in the picture, and what kind of shots you want to get. Sometimes a smaller one is perfect, other times you need something huge. Just remember, a little planning goes a long way to getting those great shots you’re after.
Frequently Asked Questions
What’s the best size for a photography backdrop?
The best size for a photography backdrop really depends on what you’re shooting. For close-up shots like headshots, a smaller one works great. But if you’re taking pictures of a whole family or a big group, you’ll need a much larger backdrop. It’s often smart to go a bit bigger than you think you’ll need, because it’s easier to crop a photo later than to try and make the background bigger if it runs out.
What size backdrop is good for family portraits?
For family photos, a 9×10 foot backdrop is usually a good choice. This size gives you enough room for everyone to fit comfortably, even if they’re standing up or if you want to get their whole bodies in the picture. It also works well for larger product photos.
What size backdrop should I use for newborn photography?
When photographing newborns, a 5×8.8 foot or 6×9.8 foot backdrop is often big enough. These sizes give you plenty of space to pose the baby and any props you might use, making sure the background looks smooth and complete.
What’s a good all-around backdrop size for single portraits?
If you’re taking pictures of just one person, an 8×8 foot backdrop is very flexible. It’s big enough for full-body shots and gives you room to move around and try different poses. It also works well if you need to take pictures of a few people together.
Can I make a small backdrop look larger in my photos?
Yes, you can definitely make a smaller backdrop look bigger! If your subject is fully in front of the backdrop, you can use photo editing software to extend the background. This is a handy trick if you have a smaller studio or need to use a compact backdrop on location.
How can I stop my backdrop from getting wrinkles?
To avoid wrinkles, especially with larger backdrops that touch the floor, you can use sandbags or weights. Place them in the corners of the backdrop where it meets the floor. This helps keep the fabric flat and smooth, which is important for clean-looking full-body shots.