The Ultimate Guide to DIY Vinyl Wrap Installation
Thinking about giving your ride a fresh new look? A DIY vinyl wrap job might seem like a big project, but it’s totally doable with the right steps and a bit of patience. This guide will walk you through everything, from getting your car ready to making sure your new vinyl wrap lasts. We’ll cover all the tricks so you can get a smooth, professional finish right in your own garage.
Key Takeaways
- Properly cleaning your vehicle is super important for the vinyl wrap to stick well.
- Having the right tools, like a good squeegee and heat gun, makes a huge difference in how your vinyl wrap turns out.
- Learning how to align and smooth out the vinyl wrap panels prevents air bubbles and wrinkles.
- Knowing how to fix common issues like lifting edges helps keep your vinyl wrap looking good.
- Regular cleaning and care will make your vinyl wrap last a long time.
Preparing Your Vehicle for Vinyl Wrap Application
Thorough Cleaning for Optimal Vinyl Adhesion
A spotless surface is paramount for vinyl to adhere correctly. Start by washing your vehicle with soap and water to remove loose dirt and grime. Next, use a degreaser to eliminate any wax, grease, or oil that could interfere with the vinyl’s adhesive. Finally, wipe down the entire surface with isopropyl alcohol to ensure a completely clean and dry surface, guaranteeing maximum adhesion and a flawless finish. Are you ready to achieve that perfect bond?
Removing Obstacles and Trim Pieces
Removing any obstructions is crucial for a smooth vinyl application. Carefully detach door handles, mirrors, emblems, and any other trim pieces that might get in the way. This step allows you to wrap the vinyl around edges and into crevices for a seamless look. Don’t forget to safely store all removed parts to prevent loss or damage, ensuring a professional-looking wrap without unsightly gaps or overlaps. What small parts are you going to remove first?
Surface Inspection and Imperfection Correction
Before applying any vinyl, meticulously inspect your vehicle’s surface for imperfections. Small scratches, dents, or rust spots can show through the vinyl and compromise the final appearance. Use body filler to smooth out any dents or imperfections, and sand down any rough spots to create a uniform surface. By addressing these issues beforehand, you’ll achieve a smooth, professional finish that enhances the look of your vinyl car wraps.
Essential Tools for a Flawless Vinyl Wrap
Selecting the Right Squeegee for Vinyl Application
Choosing the correct squeegee is paramount for achieving a smooth, professional vinyl wrap finish. Different squeegees cater to various contours and vinyl types, so understanding their nuances is key. Hard plastic squeegees are great for flat surfaces, while softer, felt-edged squeegees prevent scratching on delicate vinyl. Ultimately, the right squeegee ensures bubble-free application and protects your vinyl’s integrity.
Heat Guns and Their Role in Vinyl Conformity
A heat gun is your best friend when tackling curves and complex shapes during vinyl wrapping. Heat makes the vinyl more pliable, allowing it to stretch and conform to the vehicle’s surface. Applying heat carefully prevents bubbles and wrinkles, ensuring a seamless finish. But remember, too much heat can damage the vinyl, so practice makes perfect. Are you ready to master the art of heat application for flawless results?
Precision Cutting Tools for Vinyl Edges
Achieving clean, crisp edges is crucial for a professional-looking vinyl wrap. A high-quality cutting tools, like a knifeless tape system or a sharp detail knife, is essential for trimming excess vinyl without damaging the underlying paint. These tools allow you to create precise lines around door handles, lights, and other intricate areas. Invest in the right cutting tools and elevate your vinyl wrapping game to the next level.
Mastering Vinyl Wrap Installation Techniques
Proper Vinyl Panel Alignment and Initial Tack
Achieving perfect vinyl panel alignment is the first step to a professional-looking wrap. Careful measurement and planning are key to ensuring your vinyl covers the intended area without excess or shortage. Use masking tape to temporarily hold the vinyl in place, allowing you to make adjustments before committing to the initial tack. This ensures a smooth, even application from the start, saving you time and frustration later.
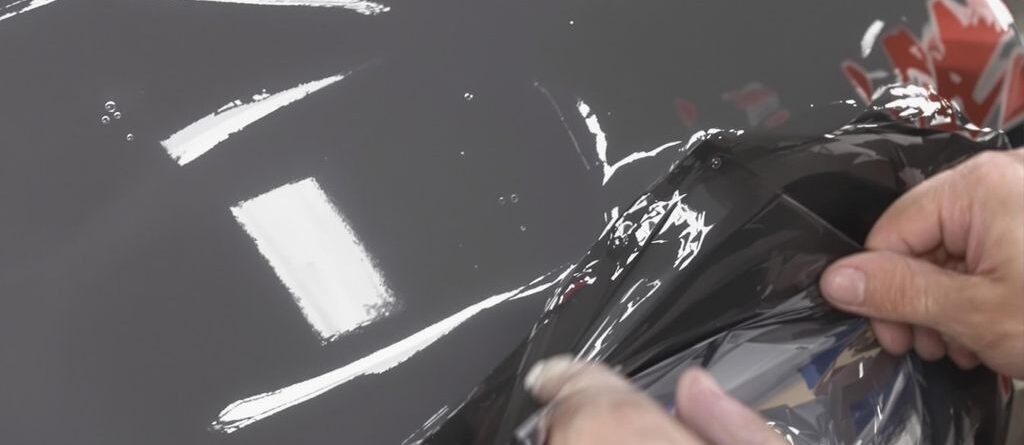
Squeegee Techniques for Bubble-Free Vinyl
Mastering the squeegee is crucial for achieving a bubble-free vinyl finish. Employing the right squeegee technique ensures a smooth, professional look. Start from the center and work your way outwards, using overlapping strokes to push out air pockets. Applying consistent pressure and using a felt-edged squeegee will prevent scratches and ensure the vinyl adheres properly, resulting in a flawless finish. Are you ready to say goodbye to those pesky bubbles?
Working with Curves and Complex Vinyl Shapes
Conquering curves and complex shapes is where vinyl wrapping becomes an art. Heat is your best friend when conforming vinyl to tricky areas. Gently heat the vinyl with a heat gun to make it more pliable, allowing it to stretch and mold around curves. Use your squeegee to carefully work the vinyl into every contour, ensuring a seamless and professional finish. This technique allows you to achieve a custom look on even the most challenging vehicle surfaces. Consider step and repeat backdrop banner for your next event.
Troubleshooting Common Vinyl Wrap Challenges
Addressing Air Bubbles in Your Vinyl Wrap
Air bubbles are a common frustration during vinyl application. These pesky pockets of air can ruin the smooth finish you’re aiming for. The solution? Use a pin or sharp blade to carefully puncture the bubble, then gently squeegee the air out. This ensures a professional-looking wrap and prevents future lifting.
Correcting Wrinkles and Creases in Vinyl
Wrinkles and creases can appear, especially on curved surfaces. Applying heat with a heat gun can make the vinyl more pliable. Gently heat the affected area and use your squeegee to smooth out the wrinkles. Are you ready to achieve that flawless finish?
Dealing with Lifting Edges on Vinyl Panels
Lifting edges can be caused by poor adhesion or insufficient heat application. Clean the surface thoroughly and reapply the vinyl, using a heat gun to ensure a strong bond. Consider using a vinyl wrap primer for enhanced adhesion, especially in challenging areas. This will keep your wrap looking great for longer.
Post-Installation Care for Your Vinyl Wrap
Initial Curing Period for Your New Vinyl Wrap
Allow your vinyl wrap to properly cure after installation for optimal adhesion. This curing process typically takes 24 to 48 hours, depending on the vinyl type and environmental conditions. During this time, avoid washing or waxing the wrapped vehicle, as this can interfere with the adhesive bonding process. This ensures the vinyl adheres correctly, preventing premature peeling and extending the lifespan of your wrap. What steps will you take to protect your wrap during this critical period?
Cleaning and Maintaining Your Vinyl Wrap
Regular cleaning is key to maintaining the appearance of your vinyl wrap. Use a mild soap and water solution with a soft sponge or microfiber cloth to gently clean the surface, avoiding harsh chemicals or abrasive cleaners. Consider using products specifically designed for vinyl wraps, as these are formulated to protect the material and enhance its shine. Regular cleaning prevents dirt and grime buildup, keeping your wrap looking fresh and vibrant. What cleaning routine will you establish to keep your wrap in top condition?
Protecting Your Vinyl Wrap from Environmental Damage
Protect your vinyl wrap from the elements to prevent fading and cracking. Parking in shaded areas or using a car cover can shield the wrap from direct sunlight, which can cause the colors to fade over time. Applying a polyester fabric banners protectant can also add an extra layer of defense against UV rays and environmental pollutants. By taking these precautions, you can significantly extend the life of your wrap and maintain its original appearance. What measures will you implement to safeguard your wrap from environmental damage?
Advanced Vinyl Wrap Techniques and Tips

Seamless Overlapping for Large Vinyl Sections
When wrapping large areas, achieving a seamless look is key, and overlapping vinyl sections is often necessary. This technique requires precision and a keen eye to avoid visible seams. Proper planning and execution will result in a professional finish, so how can you master this technique?
Inlays and Overlays for Custom Vinyl Designs
Customizing your wrap with inlays and overlays allows for unique designs, and these techniques involve layering different vinyl colors and textures. Inlays involve cutting out sections of the base wrap and replacing them with another vinyl, while overlays are applied on top. Experimenting with these methods can create stunning visual effects, but what creative designs will you come up with?
Utilizing Relief Cuts for Challenging Vinyl Areas
Complex curves and tight corners can be a vinyl wrapper’s nightmare, but relief cuts are small incisions that allow the vinyl to conform to these shapes without wrinkling. Strategic placement of these cuts is crucial for a smooth, professional finish. Mastering relief cuts will save you time and material, so are you ready to tackle those tricky areas with confidence? Remember to add extra vinyl for car wraps to account for mistakes.
Choosing the Right Vinyl Wrap Material

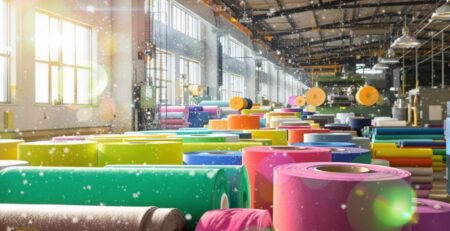
Understanding Different Types of Vinyl Films
Choosing the right vinyl film is the first step to a successful wrap. Different vinyl films offer varying levels of conformability, durability, and finish options. Cast vinyl is thinner and more conformable, making it ideal for complex curves, while calendared vinyl is thicker and more cost-effective for flat surfaces. Which type of vinyl best suits your project’s needs and budget?
Durability and Lifespan of Various Vinyl Wraps
The lifespan of your vinyl wrap depends heavily on the material you select. High-quality cast vinyl can last up to 5-7 years with proper care, while calendared vinyl typically lasts 3-5 years. Consider the environmental conditions your vehicle will face, such as sun exposure and temperature fluctuations, when making your decision. Investing in a durable vinyl wrap ensures long-lasting protection and a vibrant appearance. If you’re looking for something that lasts, consider the heavy-duty 18oz vinyl banner.
Color and Finish Options for Your Vinyl Project
Vinyl wraps come in a huge array of colors and finishes, from glossy and matte to satin and even textured options like carbon fiber. The color and finish you choose will dramatically impact the overall look of your vehicle. Consider how the color will interact with sunlight and how easy it will be to maintain. Selecting the right color and finish allows you to create a truly unique and eye-catching design. Are you ready to explore the endless possibilities of vinyl wrap colors and finishes?
Picking the right vinyl wrap material is super important for how good your project looks and how long it lasts. Different types of vinyl work best for different things, like cars, signs, or even walls. To learn more about all the cool options and find the perfect fit for your next big idea, check out our full guide on our website. We’ve got everything you need to know!
Wrapping Up Your DIY Vinyl Wrap Project
So, there you have it. Putting on a vinyl wrap yourself might seem like a big job at first, but with a bit of patience and the right steps, it’s totally doable. You’ve got the basics now, from getting your surface ready to smoothing out those bubbles. It’s a fun way to change up the look of something without spending a ton of money or making it permanent. Give it a try, and you might just surprise yourself with what you can do. It’s pretty cool to see your vision come to life, all thanks to your own hands.
Frequently Asked Questions
How long does it usually take to wrap a car yourself?
The time it takes depends on how big and tricky your car’s shape is. A small, simple car might take a weekend, while a larger or more curvy vehicle could take several days. Plan for enough time so you don’t rush and make mistakes.
What tools are absolutely necessary for a DIY vinyl wrap?
You’ll need a few key things: a sharp knife or exacto blade, a good squeegee (the tool to smooth out the vinyl), a heat gun to make the vinyl stretchy, and a cleaning solution to get your car super clean. Don’t forget a soft cloth and some masking tape too!
Can I put vinyl wrap over my car’s old paint?
Yes, you can! But it’s super important to clean the surface really well first. Any dirt, dust, or wax left behind will stop the vinyl from sticking properly and can cause bubbles or peeling later on.
How do I fix air bubbles in my vinyl wrap?
Air bubbles are common. The best way to get rid of them is to use your squeegee to push the air out towards the edges of the vinyl. For stubborn bubbles, you can carefully poke a tiny hole with a needle and then smooth the air out.
How long does a DIY vinyl wrap typically last?
Vinyl wraps can last a good while, usually between 3 to 7 years, depending on the quality of the vinyl, how well it was put on, and how you take care of it. Parking in the shade and washing it gently will help it last longer.
When can I wash my car after wrapping it?
It’s best to wait at least 24 to 48 hours after putting on the wrap before washing your car. This gives the glue time to fully stick. When you do wash it, use mild soap and a soft cloth, and avoid high-pressure washes.