Creative Ideas for Designing Your Own Brown Banner for Any Occasion
Creating a brown banner for any occasion can add a personal and charming touch to your event. Whether it’s a wedding, birthday party, or baby shower, customizing your banner allows you to express your creativity. In this article, we’ll explore various personalization techniques, themes, materials, and display ideas to help you design the perfect brown banner that will impress your guests and enhance your celebration.
Key Takeaways
- Personalize your brown banner with floral accents or calligraphy for a unique look.
- Choose a theme that complements your event, like rustic for weddings or playful for birthdays.
- Select high-quality materials to ensure your banner looks great and lasts.
- Get creative with display options, hanging your banner in eye-catching locations.
- Share your completed banner on social media to inspire others and celebrate your creativity.
Personalization Techniques for Your Brown Banner
Incorporating Floral Accents
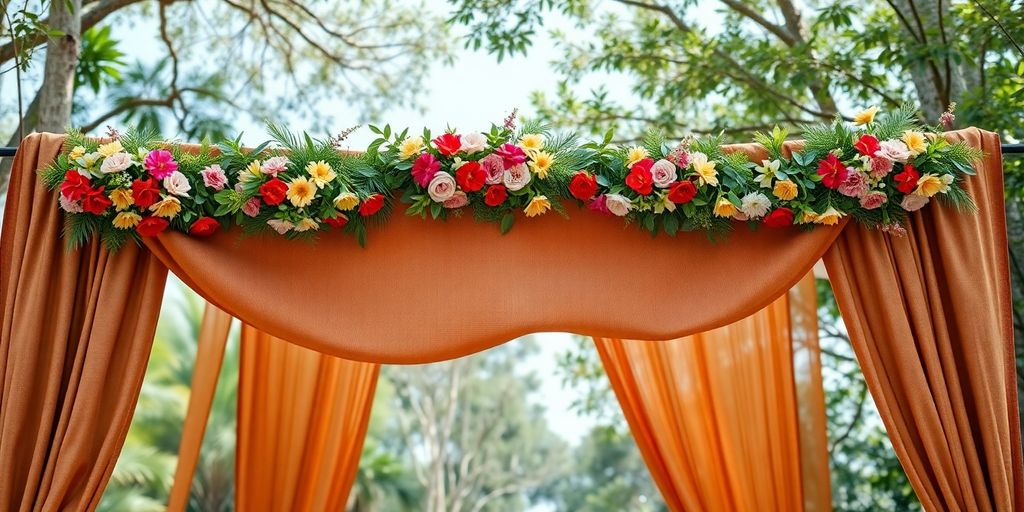
Okay, so you’ve got your brown banner ready to go, but it needs something, right? I think adding flowers is a great idea. You don’t have to go crazy; even a few small, artificial flowers glued to the corners can make a big difference. Think about the overall vibe you’re going for. Are you aiming for rustic? Use wildflowers. Something more elegant? Try roses or lilies. You can even use pressed flowers for a really unique, natural look. Just make sure the colors complement the brown of the banner.
Using Calligraphy for a Vintage Touch
I’m not gonna lie, I’m not a calligraphy expert, but even I can appreciate how cool it looks. If you’re going for a vintage or classic feel, calligraphy is the way to go. You could hand-letter the entire message on the banner, or just use calligraphy for key words or names. If your handwriting isn’t the best (like mine), you can always trace a font you like or even use stencils. The key is to take your time and be patient. A little practice goes a long way. You can find great calligraphy pens at any craft store, and there are tons of tutorials online to help you get started.
Adding Sparkle with Gems or Glitter
Okay, let’s be real, who doesn’t love a little sparkle? Adding gems or glitter to your brown banner is a super easy way to make it pop. You can use same-day banner printing to get the base done, then go wild with the embellishments. Here are some ideas:
- Outline letters with glitter glue.
- Glue small gems around the edges of the banner.
- Create a glitter ombre effect.
- Use glitter to highlight certain elements of the design.
Just a heads up: glitter can be messy. I always recommend using a good quality glitter glue and working over a protected surface. And maybe don’t use too much, unless you want your banner to look like it was attacked by a unicorn. A little goes a long way!
Creative Themes for Your Brown Banner
Rustic Wedding Themes
Okay, so you’re thinking about a rustic wedding, right? Brown banners can be amazing for this. Think burlap, kraft paper, maybe even some leather accents. You could use a calligraphy font for a super vintage vibe, or even just simple block letters for a more modern rustic look. I saw someone use pressed flowers on theirs once, and it was gorgeous! Here are some ideas:
- Burlap banner with white lettering
- Kraft paper banner with twine accents
- Brown leather banner with embossed initials
Baby Shower Inspirations
For a baby shower, a brown banner might seem a little… unexpected? But hear me out! It can be super cute, especially if you’re going for a woodland theme or something gender-neutral. Imagine a brown banner with little felt animals attached, or maybe some hand-drawn trees and leaves. You could even use different shades of brown to create a layered effect. Don’t be afraid to add pops of color with pastel ribbons or buttons. You can find affordable banners online.
Birthday Party Themes
Brown for a birthday? Absolutely! It’s all about how you style it. For a kid’s party, think about a construction theme – a brown banner could look like a big piece of cardboard with caution tape and construction vehicle cutouts. For an adult’s party, you could go for a sophisticated, minimalist look with a dark brown banner and gold lettering. Or, if you’re feeling adventurous, try a safari theme with animal prints and jungle foliage. The possibilities are endless!
I think the key with using brown is to not be afraid to mix it up with other colors and textures. It’s a neutral base, so it can really work with anything. Don’t be afraid to experiment and see what you come up with!
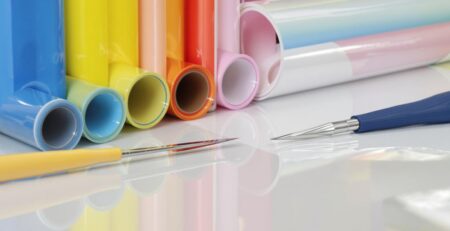
Materials to Consider for Your Brown Banner

Choosing the Right Cardstock
Okay, so you’re making a brown banner. First things first: the cardstock. It’s not just about grabbing any old brown cardstock from the store. Think about the weight. A flimsy cardstock will droop, especially if you’re adding decorations. You want something sturdy, but not so thick that it’s impossible to work with. Also, consider the texture. Do you want a smooth finish, or something with a bit of a rustic feel? The color matters too! There are so many shades of brown, from a light tan to a deep chocolate. Pick one that fits your theme.
Exploring Decorative Elements
Now for the fun part: decorations! This is where you can really let your creativity shine. Think about what kind of vibe you’re going for. Are you aiming for elegant? Try adding some lace or pearls. Rustic? How about some twine or burlap? Don’t be afraid to mix and match different elements to see what works best. Here are some ideas:
- Ribbons and bows
- Buttons and beads
- Stickers and stamps
I once made a banner for a friend’s birthday, and I used old photos to decorate it. It was a huge hit! Everyone loved seeing the memories, and it made the banner so much more personal. It’s all about thinking outside the box and using what you have on hand.
Utilizing Eco-Friendly Options
If you’re trying to be a bit more eco-conscious, there are plenty of great options for your brown banner. Instead of buying new cardstock, try using recycled paper or even cardboard. You can also find eco-friendly glues and adhesives. For decorations, consider using natural materials like leaves, twigs, or dried flowers. It’s a great way to add a unique touch to your banner while also being kind to the planet. Plus, it can be a fun project to do with kids!
Here’s a quick comparison of some eco-friendly options:
| Material | Eco-Friendly Benefit |
|---|---|
| Recycled Cardstock | Reduces waste, uses fewer resources |
| Natural Twine | Biodegradable, made from sustainable fibers |
| Plant-Based Glues | Non-toxic, made from renewable resources |
Display Ideas for Your Brown Banner
Hanging Above Gift Tables
Placing your brown banner above the gift table is a simple way to draw attention to the area. It also helps guests easily identify where to put their presents. Consider the banner’s length in relation to the table size; you don’t want it to overwhelm the space, but it should be noticeable. You can use twine, ribbon, or decorative clips to hang the banner. Make sure it’s securely fastened to avoid any accidental falls during the event. For a rustic look, use natural materials like jute or hemp cord.
Creating a Photo Backdrop
A brown banner can serve as a fantastic photo backdrop for any event. It provides a neutral, yet stylish background that complements various themes and color schemes. Here are some ideas:
- Add balloons or streamers to the banner for a festive touch.
- Incorporate floral arrangements or greenery for a natural look.
- Use props like vintage suitcases or wooden crates to enhance the backdrop’s theme.
A well-placed banner can transform a simple corner into a memorable photo opportunity. It encourages guests to take pictures and share them, creating lasting memories of your event.
Using as a Centerpiece
Using a brown banner as a centerpiece is a unique way to add character to your tables. Instead of hanging it, consider displaying it in a creative way. Here are a few ideas:
- Drape the banner across the center of the table, allowing it to cascade down the sides.
- Attach the banner to a decorative stand or easel for a more formal look.
- Use the banner as a runner, placing floral arrangements or candles on top to complete the centerpiece.
Here’s a simple table showcasing how banner length affects the overall look:
| Table Length | Recommended Banner Length | Effect |
|---|---|---|
| 6 feet | 4 feet | Balanced, allows for side decorations |
| 8 feet | 6 feet | Covers most of the table, more prominent |
| 10 feet | 8 feet | Dominant, makes a bold statement |
Maximizing Impact with Your Brown Banner
Strategic Placement at Events
Where you put your brown banner matters a lot! Think about where people will naturally look. High-traffic areas are your best bet. For example:
- Entrances: First impressions are key.
- Above key displays: Draw attention to specific items.
- Near seating areas: Capture attention during downtime.
Consider the viewing distance. A banner with small text won’t work well if it’s far away. Make sure it’s easily readable and visible from a distance. Also, think about the background. A busy background can make your banner blend in, so choose a spot with good contrast. If you’re using printed adhesive vinyl for your banner, ensure the surface is smooth and clean for optimal adhesion.
Incorporating Interactive Elements
Make your banner more than just a decoration; make it an experience! Here are some ideas:
- Photo Booth: Add props and encourage people to take pictures with the banner.
- Guest Book Alternative: Have guests sign or write messages directly on the banner (use a permanent marker!).
- QR Codes: Include QR codes that link to event information, social media, or special offers.
Interactive elements make your banner memorable and engaging. People are more likely to remember an event if they actively participate in it. This can be as simple as a hashtag for social media sharing or a poll related to the event theme.
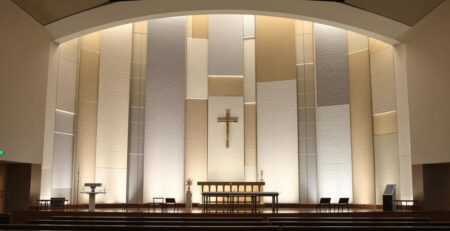
Using Lighting to Enhance Visibility
Lighting can make or break your banner’s impact. Here’s how to use it effectively:
- Spotlights: Direct spotlights onto the banner to make it stand out, especially in dimly lit venues.
- Backlighting: If your banner material allows, backlighting can create a dramatic effect.
- String Lights: Wrap string lights around the banner for a festive and eye-catching look.
Consider the color temperature of your lights. Warm lighting can enhance the rustic feel of a brown banner, while cool lighting can give it a more modern look. Also, be mindful of glare. Adjust the angle of the lights to avoid glare that could make the banner difficult to read. For holiday gatherings, consider using festive lighting to complement your banner’s message.
Examples of Successful Brown Banner Use
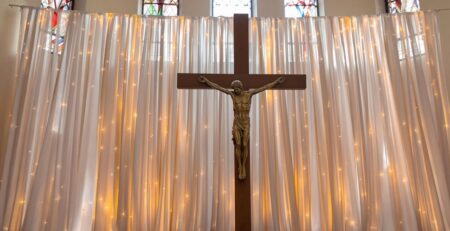
Weddings and Celebrations
Brown banners are surprisingly versatile for weddings. I’ve seen them used in rustic-themed weddings, where the brown complements the natural elements like wood and greenery. They can serve as a backdrop for the ceremony or reception, adding a touch of understated elegance. Plus, they’re great for DIY projects, allowing couples to personalize their special day without breaking the bank.
Themed Parties
For themed parties, brown banners can really set the mood. Think about a vintage-style party where a brown banner with calligraphy adds an authentic touch. Or, for a woodland-themed party, a brown banner can mimic the look of tree bark. It’s all about getting creative and matching the banner to the overall theme. You can even use stencils and paint to create custom designs that fit perfectly. Consider using polyester fabric banners for a durable and reusable option.
Community Events
Brown banners can also be effective for community events. I saw one used at a local farmer’s market to advertise fresh produce. The brown color gave it a natural, earthy feel that resonated with the market’s theme. They’re also great for school events or town festivals, providing a simple and cost-effective way to display information or promote activities. Here are some ideas:
- Welcome signs at town halls
- Information boards at school fairs
- Directional signage at outdoor events
Brown banners offer a neutral backdrop that allows other colors and designs to really pop. They’re a great choice when you want something that’s both eye-catching and versatile.
Tips for Crafting Your Brown Banner
Planning Your Design Ahead
Before you even think about cutting anything, spend some time planning. I usually start with a rough sketch. It doesn’t have to be perfect, but it helps to visualize the final product. Consider the size of your banner, the font you want to use, and the overall layout. This will save you a lot of headaches later on. Think about the message you want to convey and how the AYSO team banners can help you achieve that.
Experimenting with Colors and Patterns
Don’t be afraid to get a little wild! Brown might seem like a limiting color, but it’s actually a great neutral base. Try these:
- Pairing it with metallics like gold or copper for a touch of elegance.
- Adding pops of bright colors like teal or coral for a fun, modern look.
- Using different shades of brown to create a subtle, textured effect.
I once made a brown banner for a friend’s rustic-themed party, and I used coffee to stain some of the paper for a cool, aged effect. It was a total hit!
Sharing Your Creation on Social Media
Okay, you’ve put in the work, and your banner looks amazing. Now it’s time to show it off! Snap some photos and share them on your favorite social media platforms. Use relevant hashtags like #DIYbanner, #brownbanner, or #craftproject to reach a wider audience. You might even inspire someone else to create their own advertising flags! Plus, it’s always fun to get feedback and see what people think of your creation. Don’t forget to tag any brands or materials you used – they might even feature your work!
Creating a brown banner can be fun and easy! Start by choosing a simple design that matches your message. Use clear and bold text so everyone can read it easily. Don’t forget to add some eye-catching images or logos to make it stand out. For more tips and to see our selection of banners, visit our website today!
Wrapping It Up
So there you have it! Making your own brown banner for any occasion is not just fun, it’s a great way to show off your creativity. Whether you’re going for something simple or something a bit more elaborate, the options are endless. Just remember to pick materials that fit your style and theme. Don’t be afraid to add personal touches like glitter or flowers to make it truly yours. And once you’re done, hang it up proudly! Your guests will love it, and you’ll have a special keepsake from your event. So grab those supplies and get crafting!
Frequently Asked Questions
What materials do I need to make a brown banner?
To create a brown banner, you will need cardstock, scissors, glue or tape, string or twine, and decorations like markers or stickers.
How can I personalize my brown banner?
You can personalize your banner by adding flowers, using calligraphy for the text, or incorporating glitter and other fun decorations.
What themes work well with a brown banner?
Brown banners fit nicely with rustic weddings, baby showers, and birthday parties. You can match the theme with colors and designs.
Where is the best place to display my banner?
Hang your banner above gift tables, use it as a backdrop for photos, or place it as a centerpiece to make it stand out.
How can I make my banner more eye-catching?
You can enhance your banner by placing it in a strategic spot, adding lights for visibility, or including interactive elements for guests.
Can I share my banner design on social media?
Absolutely! Sharing photos of your banner on social media is a great way to inspire others and showcase your creativity.