Create the Perfect Personalized Banner for Birthday Celebrations
Planning a birthday party? A personalized banner for birthday celebrations can really set the mood and make the day feel special. It’s not just about the cake and gifts; it’s about creating an atmosphere that reflects the personality of the birthday person. With the right design, materials, and customization, your banner can be a standout piece that everyone will remember. Let’s dive into how to create the perfect personalized banner for that special celebration!
Key Takeaways
- Choose bright colors and fun fonts to grab attention.
- Use high-quality materials for durability, especially outdoors.
- Align your banner design with the party theme for a cohesive look.
- Explore printing options like single or double-sided to enhance visibility.
- Make ordering easy by using online design tools or working with professionals.
Choosing The Right Design For Your Personalized Banner

Okay, so you’re ready to make a personalized banner for a birthday. Awesome! But where do you even start with the design? It can be a little overwhelming, but don’t worry, we’ll break it down. The design is what really makes the banner special, so it’s worth spending a little time to get it right. Think about the person you’re celebrating and what they like. What are their favorite colors? Do they have a favorite hobby or character? All of these things can help you create a banner that they’ll truly love.
Selecting Colors That Pop
Colors are super important! They set the whole mood of the banner. You want colors that grab attention, but also fit the birthday person’s style. Think about the party theme too. Is it a bright and cheerful party? Go for bold, vibrant colors like yellows, pinks, and blues. Is it a more sophisticated celebration? Maybe stick to elegant colors like gold, silver, and deep reds. Don’t be afraid to experiment, but try to keep the color scheme consistent.
Incorporating Fun Fonts
Fonts can really add personality to your banner. A playful, bubbly font is great for a kid’s birthday, while a more classic font might be better for an adult. Just make sure the font is easy to read from a distance. Here are a few things to keep in mind:
- Legibility is key: Choose fonts that are clear and easy to read, even from a distance.
- Consider the tone: Match the font to the overall theme and personality of the birthday celebration.
- Limit the number of fonts: Stick to one or two fonts to keep the design clean and cohesive.
Adding Personal Photos
Adding photos is a fantastic way to make the banner extra special. Choose photos that are clear and high-resolution. You can use photos of the birthday person alone, or include photos with family and friends. If you’re using multiple photos, try to arrange them in a visually appealing way. Maybe create a collage or a timeline of photos from different years. It’s a great way to bring back memories and make the banner truly unique.
A great tip is to consider the background of your photos. Busy backgrounds can make the text on your banner harder to read. If possible, choose photos with simple backgrounds or use photo editing software to blur the background slightly. This will help the photos blend seamlessly with the rest of the design.
Materials That Make Your Banner Stand Out

Choosing the right material can really make your personalized birthday banner pop! It’s not just about slapping some ink on anything; it’s about picking something that looks good, lasts, and fits your budget. Let’s explore some options.
Understanding Vinyl Options
Vinyl is a super popular choice, and for good reason. It’s durable, weather-resistant, and prints really well. You’ll usually see it in different weights, like 13oz or 18oz. The heavier the weight, the tougher the banner. A 13oz matte vinyl banner is a great all-around option, offering a good balance of quality and cost. If you want something extra tough, especially for outdoor use, go for the 18oz. There’s also gloss vinyl, which gives colors a really vibrant look.
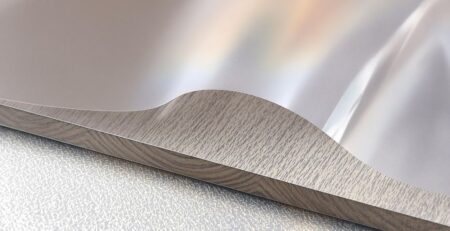
Exploring Fabric Choices
Fabric banners are becoming more popular, especially for indoor use. They have a softer, more elegant look than vinyl. Plus, they don’t have that plastic-y sheen. Fabric is great if you want something that drapes nicely and feels a bit more upscale. A premium nylon/polyester blend material called Banner Soft is ideal for indoor displays and has a low shine that produces a high end look and feel.
Durability for Outdoor Use
If your banner is going outside, you need to think about the weather. Wind, rain, and sun can all take a toll. Vinyl is generally pretty good at handling the elements, but you might want to consider a heavier weight for extra durability. Mesh banners are also a good option because they let air pass through, reducing the risk of the banner tearing in strong winds. Choosing the right material is key to ensuring your banner lasts through the entire celebration and beyond.
For outdoor banners, consider these factors:
UV resistance to prevent fading.
Tear strength to withstand wind.
Water resistance to handle rain.
Here’s a quick comparison of common banner materials:
| Material | Pros | Cons |
|---|---|---|
| 13oz Vinyl | Affordable, good print quality, decent durability | Can tear in high winds, less elegant look than fabric |
| 18oz Vinyl | Very durable, weather-resistant | Heavier, more expensive |
| Mesh Vinyl | Allows airflow, good for windy conditions | Print quality not as sharp as solid vinyl |
| Polyester Fabric | Elegant look, soft feel, great for indoor use | Not as durable as vinyl, can be more expensive, less weather resistant |
Consider the different types of banners available to make the best choice for your needs.
Customizing Your Banner For The Birthday Theme
Aligning With Party Themes
So, you’re throwing a birthday bash? Awesome! Now, let’s make sure your banner isn’t just there, but that it actually fits the vibe. Think about it: a banner with pirates wouldn’t really work for a princess party, right? The key is to make sure your banner complements the overall theme. If you’re going for a specific decade, like the ’80s, throw in some neon colors and geometric shapes. For a superhero theme, use bold fonts and comic book-style graphics. It’s all about creating a cohesive look that ties everything together.
Using Themed Graphics
Okay, you’ve got your theme down. Now it’s time to get visual! Themed graphics can seriously take your banner to the next level. Instead of just slapping on some generic clip art, try to find images that really capture the essence of the party. Are you doing a luau? Think hibiscus flowers, tiki torches, and maybe even a cartoon volcano. For a sports-themed party, use images of basketballs, footballs, or whatever sport the birthday person loves. You can find tons of free graphics online, or even create your own if you’re feeling crafty. And remember, less is often more. Don’t overcrowd your banner with too many images; keep it clean and easy to read. You can easily create banners with photos and personal messaging to celebrate another great year.
Incorporating Personal Messages
This is where you can really make your banner special. Forget the generic "Happy Birthday" – let’s get personal! Think about inside jokes, nicknames, or special memories you share with the birthday person. A simple "Happy 30th, you old fart!" can be way more impactful than a formal message. Or, if you’re feeling sentimental, you could include a short quote that’s meaningful to them. Just make sure your message is clear, concise, and easy to read from a distance. And don’t be afraid to get creative with the font and layout. This is your chance to show the birthday person how much you care, so don’t hold back!
A personalized message can transform a simple banner into a cherished keepsake. It shows that you put thought and effort into creating something unique and meaningful. These small touches are what make birthday celebrations truly special.
Here’s a quick guide to help you:
- Brainstorm: Jot down inside jokes, nicknames, and special memories.
- Keep it short: Aim for a message that’s easy to read at a glance.
- Choose the right font: Make sure it’s legible and fits the overall theme.
Printing Options For Your Personalized Banner
Single-Sided vs. Double-Sided
When it comes to printing your personalized birthday banner, one of the first decisions you’ll face is whether to go with single-sided or double-sided printing. Single-sided banners are more cost-effective and work great when the banner will be displayed against a wall or in a location where only one side is visible. Double-sided banners offer visibility from multiple directions, making them ideal for open spaces or areas with foot traffic from both sides. Keep in mind that double-sided banners will generally cost more due to the extra printing and material involved.
Finishing Touches That Matter
Don’t underestimate the impact of finishing touches! These details can really elevate the look and functionality of your banner. Here are a few options to consider:
- Grommets: Metal rings placed at intervals along the edges of the banner, allowing for easy hanging with rope, zip ties, or hooks.
- Pole Pockets: Fabric sleeves sewn into the top and bottom (or sides) of the banner, allowing you to slide a pole through for hanging or display.
- Reinforced Hems: Folding and hemming the edges of the banner to add strength and prevent tearing, especially important for outdoor use.
- Wind Slits: Strategically placed cuts in the banner to allow wind to pass through, reducing stress and preventing damage in windy conditions.
Choosing the right finishing touches depends on how you plan to display your banner and the environment it will be in. For example, a banner displayed outdoors in a windy area would greatly benefit from reinforced hems and wind slits.
Choosing The Right Size
Selecting the appropriate size for your birthday banner is crucial for visibility and impact. A banner that’s too small might go unnoticed, while one that’s too large could overwhelm the space. Consider these factors when determining the right size:
- Viewing Distance: How far away will people be viewing the banner from? The further away, the larger the banner needs to be.
- Display Location: Where will the banner be displayed? A large wall can accommodate a bigger banner than a doorway.
- Content: How much text and graphics are on the banner? More content requires a larger banner to ensure readability. You can customize a personalized banner with photos and text.
Here’s a general guideline for banner sizes based on viewing distance:
| Viewing Distance | Recommended Banner Height | Recommended Banner Length |
|---|---|---|
| Up to 10 feet | 2-3 feet | 4-6 feet |
| 10-20 feet | 3-4 feet | 6-8 feet |
| 20-30 feet | 4-6 feet | 8-12 feet |
Easy Ordering Process For Custom Banners
Using Online Design Tools
Online design tools have really changed how we get things done. For birthday banners, it’s no different. Most sites offer a pretty straightforward way to create your banner right on their website. You can pick from templates, upload your own images, and mess around with text until it looks just right. It’s usually drag-and-drop, so you don’t need to be a design whiz to get something cool. Plus, you can see a preview of what the final product will look like before you even think about paying.
- Start with a template or a blank canvas.
- Upload your photos and graphics.
- Add text and customize fonts and colors.
Working With Professional Designers
Sometimes, you just want to leave it to the pros. If you’ve got a specific vision or need something super polished, working with a professional designer is the way to go. Many banner companies have in-house designers who can take your ideas and turn them into a banner that really pops. It might cost a bit more, but you’re paying for expertise and a guarantee that the final product will look amazing. You’ll usually get a few rounds of revisions to make sure it’s exactly what you want.
Getting a professional designer involved can really take the stress out of the process. They know what looks good, what prints well, and can handle all the technical stuff so you don’t have to.
Understanding Shipping Options
Okay, so you’ve designed your banner, and it looks awesome. Now, how do you get it? Shipping options are a big deal, especially if you’re on a tight deadline. Most companies offer a range of choices, from standard ground shipping to express or even overnight delivery. Obviously, the faster you need it, the more it’s going to cost. Also, keep an eye out for any deals on shipping; some places offer free shipping if you spend a certain amount. Here’s a quick rundown:
| Shipping Option | Estimated Delivery Time | Cost |
|---|---|---|
| Standard | 3-5 business days | $5 – $15 |
| Express | 1-2 business days | $15 – $30 |
| Overnight | 1 business day | $30 – $50 |
Displaying Your Personalized Banner Effectively
Best Mounting Techniques
Okay, so you’ve got this awesome custom birthday banner, and now you’re wondering how to actually hang it up. Don’t just slap it on the wall with tape! Let’s do this right. For indoor banners, consider using command strips – they’re great because they don’t damage the paint. If you’re dealing with a heavier fabric banner, you might want to use small nails or tacks, especially if you plan on keeping the banner up for a while. Outdoor banners need something sturdier. Think about using rope or bungee cords to secure the banner to posts, fences, or trees. Make sure you use the grommets (those metal rings) to prevent tearing. Wind can be a real pain, so secure it well!
Creative Display Ideas
Time to get creative! Banners don’t have to be boring. Instead of just hanging it on a wall, why not try draping it across a fireplace mantel? Or, if you have a staircase, you could run the banner along the railing. For outdoor parties, think about creating a banner backdrop for photos. You could even build a simple frame out of wood to hold the banner and decorate it with balloons or streamers. If you’re feeling extra fancy, you could use a projector to display images or messages on the banner at night. Here are some ideas:
- Backdrop: Create a photo booth area with the banner as the background.
- Table Runner: Use a smaller banner as a unique table runner.
- Ceiling Decor: Hang the banner from the ceiling for a festive look.
Ensuring Visibility at Events
Visibility is key! You want everyone to see your awesome banner. First, think about the size of the banner in relation to the space. A tiny banner in a huge room won’t make much of an impact. Place the banner in a high-traffic area where people are sure to see it. Make sure there’s enough light – a dimly lit banner is as good as invisible. If you’re outdoors, consider the angle of the sun. You don’t want the banner to be in direct sunlight, which can cause glare and make it hard to read. Also, check for obstructions like trees or poles that might block the view. Consider these points:
- Check for obstructions.
- Ensure adequate lighting.
- Choose a high-traffic location.
Think about the viewing distance. A banner with small text might look great up close, but it will be unreadable from across the room. Use large, clear fonts and high-contrast colors to make sure your message is easy to read from a distance. Also, consider the background. A busy background can make it hard to see the banner, so try to choose a simple, uncluttered backdrop.
Maintaining Your Birthday Banner
Cleaning Tips for Longevity
So, you’ve got this awesome birthday banner, right? You want it to last, maybe even reuse it for future parties. The key is proper cleaning. Most banners, especially vinyl, can be wiped down with a damp cloth. Avoid harsh chemicals or abrasive cleaners, as these can damage the print and material. For fabric banners, check the care label; some might be hand-washable. If you spot clean, test a small, inconspicuous area first to make sure the colors don’t run. Regular, gentle cleaning will keep your banner looking fresh for years to come.
Storing Your Banner Safely
Okay, the party’s over, and it’s time to pack up the banner. Don’t just crumple it into a ball and toss it in a box! Proper storage is super important. Here’s what I do:
- Roll it up: Rolling the banner (print side out) prevents creases and folds that can become permanent. Use a cardboard tube for extra support.
- Wrap it: Cover the rolled banner in a protective layer, like bubble wrap or acid-free paper, to shield it from dust and scratches.
- Store it cool and dry: Avoid storing your banner in direct sunlight or damp places, as this can cause fading and mildew. A closet or storage room works great.
Storing your banner correctly is just as important as choosing the right design. Think of it as an investment – a little care now means you can pull it out year after year and relive those birthday memories.
Repairing Minor Damage
Accidents happen. Maybe your banner got a small tear or a grommet popped out. Don’t panic! Minor damage is often fixable. For small tears in vinyl banners, try using clear vinyl repair tape. It’s almost invisible and will prevent the tear from getting bigger. If a grommet comes loose, you can buy a grommet repair kit and reattach it yourself. For fabric banners, a needle and thread can work wonders for small rips. However, for significant damage, like large tears or faded prints, it might be time to consider a replacement. But with a little TLC, you can keep your custom birthday banners looking great for many celebrations to come.
To keep your birthday banner looking great, store it in a cool, dry place when not in use. Avoid folding it to prevent creases; instead, roll it up gently. If it gets dirty, clean it with a damp cloth and mild soap. For more tips on how to care for your banner, visit our website!
Wrapping It Up
So, there you have it! Making a personalized birthday banner is easier than you might think. Just remember to pick a theme that fits the birthday person, choose colors and fonts that pop, and don’t forget to add those personal touches like photos or fun messages. With a little creativity and the right tools, you can whip up a banner that not only looks great but also makes the celebration feel extra special. Whether it’s for a big milestone or just another year, a custom banner can really set the mood. So go ahead, get started on your design, and make that birthday bash unforgettable!
Frequently Asked Questions
What should I consider when choosing a design for my banner?
Think about colors that stand out, fun fonts, and adding personal photos to make it unique.
What materials are best for making a banner?
Vinyl is great for durability, but fabric can look nice too. Choose based on where you’ll display it.
How can I match my banner to the birthday theme?
Use colors, graphics, and messages that fit the party theme to create a cohesive look.
What are the printing options available for banners?
You can choose between single-sided or double-sided printing and decide on the size that fits your space.
How do I order a custom banner easily?
Use online design tools, or work with professionals to create your banner, and check your shipping options.
How can I display my banner effectively at the party?
Use good mounting techniques and think about creative ways to place it so everyone can see it.